Showing posts with label Pet. Show all posts

Thursday, May 19, 2022

Doberman Pinscher Basket


Doberman Pinscher Basket-JMR


You can purchase the Silhouette design file here: https://www.silhouettedesignstore.com/artists/485222


Approximate Box size: H 2.50” X W 3” X D 2.50”

Approximate Design size: W 4” X H 5.5” X D 2.5” including handle


This cute Doberman Pinscher Dog Basket is a perfect gift container for dog lovers or for dog treats.


1.Cut design pieces. (I used double sided card stock) ( there is an additional nose base incase you want to switch the color behind his nostrils. I didn’t use it in the main photo)

2. Glue the doberman face (with cutout ears) to the face base; aligning at ears and sides. (The face base is slightly smaller than the face with cut outs.) Glue the tiny black eye pupils to each of the round iris eyes with cutouts; aligning around the cutouts. Glue the black paw prints to the gray paw print bases; centering them.

3.Glue the inner ears to the coordinating shapes on the combined doberman face. Glue the last paw print shapes (with cutouts) to the combined paw prints centering them.

4.Using foam adhesive squares, attach the paws to the coordinating shapes on the front leg shapes. ( helpful hint; You can use a marker to color your squares to match the color of paper you are using to make them less noticeable) Glue the combined eyes to the white eye circles. ( You can position the pupils differently to achieve different expressions. I place mine in the center and later added enamel jewels a little lower on the eye) Apply glue to the top of the eyebrow/cheek (brown) piece and a foam adhesive square to the middle. Attach the gray eyebrow/nose. 

5. This is what it should look like.

6. Flip this combined piece over. Apply glue to the top section and adhesive squares to each side as shown. Attach to the combined face base.

7.Glue the combined eyes into place. You can glue the nose to the nose base or leave the nose shape see through to capture the color underneath. Curve the tongue.

8.  Glue the nose in place. Apply glue to the back of the tongue and attach to the area directly under the nose.

9. This is what it should look like.

10. Using foam adhesive squares, attach the combined dog face to the coordinating shape on the box base.

11. Apply glue to the backside top of the combined legs and an adhesive square to the bottom. Attach to the box base as shown.

12. Fold the box at the score lines as shown.

13. Flip the box base over as shown. Apply glue to the two top tabs and secure to the rounded section above.

14. Apply glue to the two remaining tabs and secure to the dog shape section below creating a box.

15. Insert the handle to the slot on either side of the basket.

16. Using foam adhesive squares, attach the combined paws and tail to the backside of the basket.

17. I finished with a ribbon.


Monday, March 9, 2020

German Shepherd Basket


German Shepherd Basket-JMRush


Approximate Box size: H 2.50” X W 3” X D 2.50”
Approximate Design size: W 4” X H 6.5” X D 2.5” including handle

This cute German Shepherd Dog Basket is a perfect gift container for dog lovers or for dog treats. This design is compatible with both 8X12 and 12X12 mats.

You can purchase the Silhouette design file here: https://www.silhouettedesignstore.com/artists/485222

You can purchase the SVG and Cricut compatible file here: https://www.jamieandjenn.com  Coming Soon:)


1.Cut design pieces. (I used double sided card stock)
2. Glue the Circular Medallion piece to the matching shape on the solid large face base. 
3.Glue the collar to the corresponding shape on the solid large face base ( I used black but included this piece in case you wanted a different colored collar:). 
4.Glue the face piece with open eyes/mouth to the combined face base.
5. Glue the narrow face piece to the combined face.
6.Glue the eyebrow face piece to the combined face.
7.Glue the white teeth to the combined face; aligning with the teeth below.
8. Curve the tongue piece and glue the top section to the combined face as shown (optional piece)
9. Glue the black nose/jaw piece. (Be sure to lift the tongue above the lower jaw section of this piece).
10. Attach the muzzle section with glue or foam adhesive squares.
11. Glue the nose on.


12. I used adhesive jewels to accentuate the eyes.
13. Glue the chest and bottom hair sections to the upper and lower sections of the basket base as shown. glue the smaller paws to the larger ones;centering them.
14. Glue the paws with cutouts to the combined paws.
15. Flip the basket base over and fold the score lines as shown.
16. Apply glue to the two top tabs and secure to the rounded section above.
17. Apply glue to the two bottom tabs and secure to the dog shape section below creating a box.
18. This is what it should look like:)
19. Using foam adhesive squares, attach the combined dog face to the corresponding shape of the combined basket; aligning at the side edges.
20. Using foam adhesive squares, attach the combined paws and tail to the backside of the basket.
21. Insert the handle to the slot on either side of the basket.

22. I finished with a ribbon.
23. I used a thin marker to darken the edges of the muzzle piece as the white of the teeth were showing on the edges. This may not be necessary if creating a lighter colored german shepherd:)

Wednesday, October 9, 2019

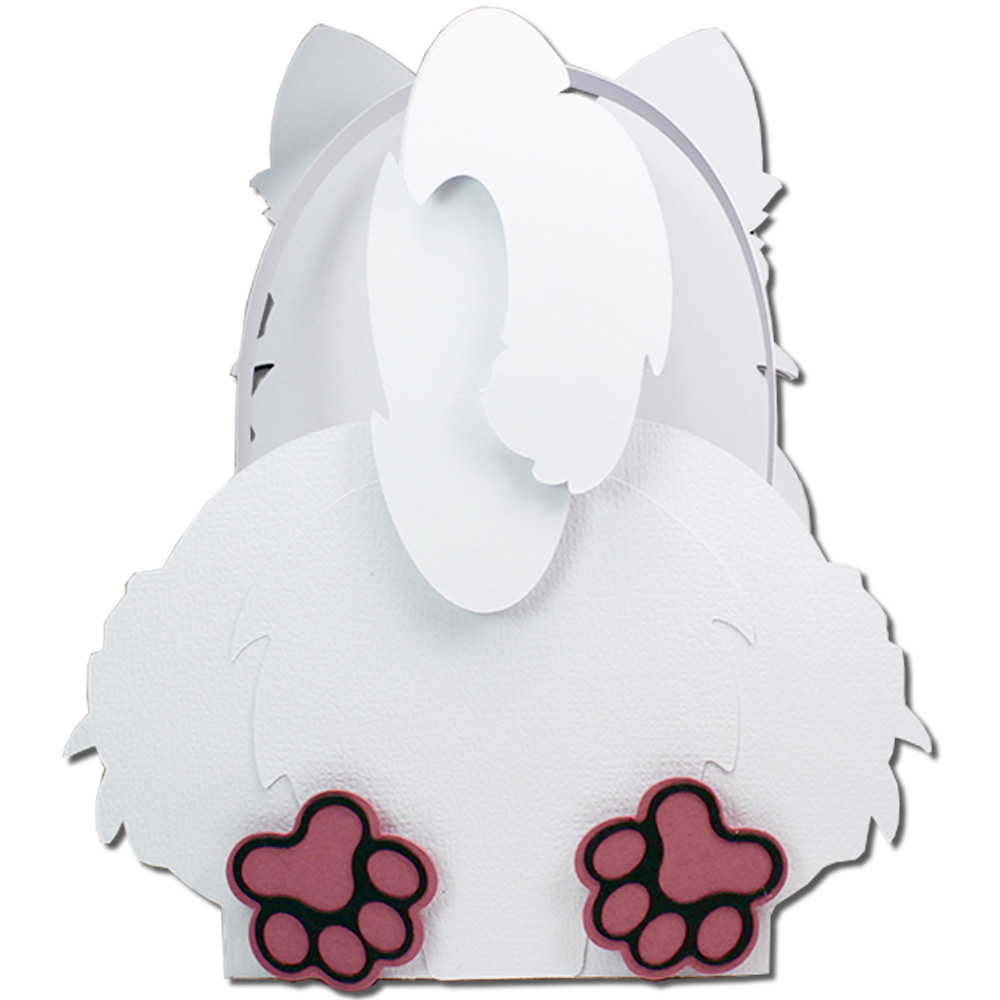
White Long Hair Cat Handle Basket


White Long Hair Cat Handle Basket- JMRush 
Approximate Box size: H 2.25” X W 3” X D 2.25”
Approximate Design size: W 4.5” X H 5.5” including handle

This cute basket design is a perfect container for treats for your favorite feline, a small gift for your veterinarian, or a party favor. This design is compatible with both 8X12 and 12X12 mats.


You can purchase the Silhouette design file here: https://www.silhouettedesignstore.com/artists/485222

You can purchase the SVG and Cricut compatible file here: https://www.jamieandjenn.com  

  1. Cut design pieces. ( I used double sided card stock and glitter card stock of the eyes) (There are two pink noses in this file that is not shown in the tutorial and I adjusted the tail to be larger)
  2. Glue the face piece with openings and a chin to the coordinating black solid cat face. I used a marker to color the outside edges of both large blue eyes. Glue them to the openings in the combined cat face. Glue the smaller solid paws and feet to the larger solid feet and paws.
  3. Glue the fury bottom piece to the coordinating shape on the lower section of the basket base. Glue the other fury chest/head piece to the coordinating shape on the upper section of the basket base.
  4. Glue the combined cat face to the cat face/chest piece. Glue the inner ears to the coordinating shape on the combined cat face. Using foam adhesive squares, attach the smaller tail to the coordinating shape on the larger tail. Glue the small oval white pieces to the cording shapes on the cat’s eyes.
  5. Attach the smallest cat head (with cut outs) to the combined cat face using foam adhesive squares. Glue the nose into place.
  6. Glue the combined cat to the coordinating shape on the basket. Use foam adhesive squares to attach the front paws to the top section of the basket and the back feet and tail to the bottom section.
  7. I used enamel dots to accentuate the eyes.
  8. Flip the combined basket over. Fold the basket base at the score lines.
  9. Apply glue to the top two tabs on the basket base and secure to the Cat shape above.
  10. Apply glue to the bottom two tabs on the basket base and secure to the rounded shape above creating a box.
  11. Image of box completed.
  12. Insert the handle on either side of the basket.
  13. I added a ribbon.
  14. Use three small lengths of thread and apply hot glue to one of the groups of ends. Attach the nose. Repeat for the other side:)
  15. Image of the whiskers glued.
  16. Hot glue the second pink nose on top of the whiskers:)


Wednesday, October 2, 2019

Black Cat Handle Basket


Black Cat Handle Basket- JMRush 
Approximate Box size: H 2.50” X W 3” X D 2.50”
Approximate Design size: W 4.5” X H 5.5” including handle

This cute basket design is a perfect container for treats for your favorite feline, a small gift for your veterinarian, or a Halloween party favor. This design is compatible with both 8X12 and 12X12 mats. 


You can purchase the Silhouette design file here: https://www.silhouettedesignstore.com/artists/485222

You can purchase the SVG and Cricut compatible file here: https://www.jamieandjenn.com  


  1. Cut design pieces. ( I used double sided card stock and glitter card stock of the eyes) 
  2. Glue the fury bottom piece to the coordinating shape on the lower section of the basket base. Glue the other fury chest/head piece to the coordinating shape on the upper section of the basket base. I used a marker to color the outside edges of both large yellow eyes.
  3. Glue the yellow eyes to the coordinating shape on the combined basket. Glue the smaller solid paws and feet to the larger solid feet and paws.
  4. Attach the cat head ( black with cut outs) to the combined basket using foam adhesive squares.
  5. Use a small piece of foam adhesive square to attach the nose. ( Hint- I use a black sharpie to color the edges of the white foam adhesive square so it’s not so noticeable:) Use foam adhesive squares to attach the front paws to the top section of the basket and the back feet and tail to the bottom section.
  6. Flip the combined basket over. Fold the basket base at the score lines.
  7. Apply glue to the top two tabs on the basket base and secure to the rounded shape above.
  8. Apply glue to the bottom two tabs on the basket base and secure to the head shape above creating a box.
  9. Insert the handle on either side of the basket.
  10. Use three small lengths of thread and apply hot glue to one of the groups of ends. Attach underneath the nose. Repeat for the other side:)
  11. I used enamel dots to accentuate the eyes and added a ribbon:)

Tuesday, October 1, 2019

Yellow Cat Handle Basket


Yellow Cat Handle Basket- JMRush 
Approximate Box size: H 2.50” X W 3” X D 2.50”
Approximate Design size: W 3.75” X H 5.5” including handle

This cute basket design is a perfect container for treats for your favorite feline or a small gift for your veterinarian. This design is compatible with both 8X12 and 12X12 mats.


You can purchase the Silhouette design file here: https://www.silhouettedesignstore.com/artists/485222


You can purchase the SVG and Cricut compatible file here: https://www.jamieandjenn.com 

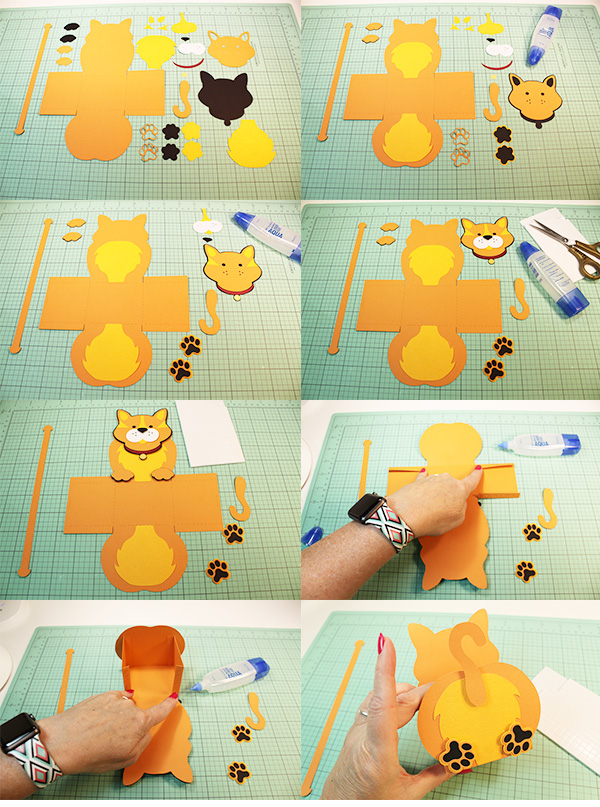
  1. Cut design pieces. ( I used double sided card stock) 
  2. Glue the fury bottom piece to the coordinating shape on the lower section of the basket base. Glue the other fury chest piece to the coordinating shape on the upper section of the basket base. Glue the cat head shape with cut outs to the solid black cat head shape. Glue the smaller solid paws and feet to the larger solid feet and paws.
  3. Glue the small rounded muzzle pieces to the muzzle base ( that has a coordinating shape plus a long vertical line). Glue the small triangular face markings to either side of the combined cat head. Glue the inner ear pieces to the combined cat head. Glue the collar and collar tag to the combined cat head. Glue the feet pieces that  have cutouts to the combined feet.
  4. Glue the combined muzzle piece to the combined cat head. Use a small piece of foam adhesive square to attach the nose.
  5. Use foam adhesive squares to attach the combined head to the coordinating shape on the basket base. use foam adhesive squares to attach the front paws to the basket.
  6. Flip the combined basket over. Fold the basket base at the score lines. Apply glue to the top two tabs on the basket base and secure to the rounded shape above.
  7. Apply glue to the bottom two tabs on the basket base and secure to the head shape above creating a box.
  8. Use foam adhesive squares to attach the feet and the tail to the back of the basket.
  9. Insert the handle on either side of the basket.
  10. I used enamel dots to accentuate the eyes and added a ribbon.
  11. Use three small lengths of thread and apply hot glue to one of the groups of ends. Attach underneath the nose. Repeat for the other side:)


Monday, June 25, 2018

Pug Dog Basket

Pug Dog Basket-JMR
Approximate Box size: H 2.50” X W 3” X D 2.50”
Approximate Design size: H 5.50” X W 3.75” including handle


This cute Pug Dog Basket is a perfect gift container for dog lovers or for dog treats. This design is compatible with both 8X12 and 12X12 mats.

You can purchase the Silhouette design file here: https://www.silhouettedesignstore.com/artists/485222

You can purchase the SVG and Cricut compatible file here:https://www.jamieandjenn.com  Coming Soon:)


  1. Cut the design pieces. I used double sided card stock. (The dog basket base will be slightly different then what is shown at the beginning of this tutorial- adjustments were made:)
  2. Flip the basket base head side down. Fold the basket base at the score lines. Glue the light colored round eye pieces (2) to the back of the black dog eyes/face piece with cutouts.  Glue the black paw prints to the back of the brown paw prints with cut outs; centering them. Glue the small black nose to the gray muzzle piece; aligning the nostril holes.
  3. Apply glue to the top two tabs and secure to the rounded backside piece just above. Glue the solid brown paw print pieces to the back of the combined paw prints.
  4. Apply glue to the bottom two tabs and secure to the dog silhouette piece just below; creating a box.
  5. Use a foam adhesive square to attach the ears to the coordinating shapes on the solid large dog face shape. Glue the muzzle and chin piece to the combined black eye/face piece. Use foam adhesive squares to attach the combined dog face to the solid large dog face shape. Apply glue to the tops of the eyebrows and secure down to the first layer. Apply glue to the top tips of the ears and secure to the first layer: this is just to add dimension.
  6. Use foam adhesive squares to attach the combined dog face to the front of the basket base; aligning at the top edges. Use a foam adhesive square to attach the front feet.
  7. I placed a bow under the dog’s chin.
  8. Turn the basket to the backside and attach the tail piece with a foam adhesive square; centering it. Use foam adhesive squares to attach the combined paws into place:)
  9. Insert the handle piece into the slots on each side of the combined basket. 
  10. Ta da:)

Friday, May 4, 2018

Labrador Retriever Dog Basket


Labrador Retriever Dog Basket-JMR
Approximate Box size: H 2.50” X W 3” X D 2.50”
Approximate Design size: H 5.50” X W 4” including handle

This cute Dog Basket is a perfect gift container for dog lovers or for dog treats. This design is compatible with both 8X12 and 12X12 mats.

You can purchase the Silhouette design file here: https://www.silhouettedesignstore.com/artists/485222

You can purchase the SVG and Cricut compatible file here:https://www.jamieandjenn.com  Coming Soon:)


  1. Cut the design pieces. I used double sided card stock.
  2. Flip the basket base as shown. Fold the basket base at the score lines. Glue the black paw prints to the slightly larger paw prints; centering them. Glue the face piece with eye cut outs to the larger face piece. Attach the nose to the muzzle piece with a foam adhesive square.
  3. Apply glue to the top two tabs and secure to the rounded backside piece just above. Glue the light colored paw print pieces with cut outs to the combined paw prints. Using foam adhesive squares; attach the combined nose/ small muzzle piece to the combined dog face. Curve the dog tongue as you like.
  4. Apply glue to the bottom two tabs and secure to the dog silhouette piece just below; creating a box. Glue the tongue into place (optional). 
  5. Glue one of the two fur detail pieces to the front center of the basket base; aligning at the bottom. Use foam adhesive squares to attach the combined head and front paws to the front of the basket base.
  6. On the backside: Glue the last fur detail pieces to the front center of the basket base; aligning at the bottom. Use foam adhesive squares to attach the tail and back combined paws to the back of the basket.
  7. Insert the handle piece into the slots on each side of the combined basket.
  8. I used adhesive enamel dots to accentuate the eyes and collar and finished with a ribbon:)

Tuesday, May 1, 2018

Westie Dog Basket


Westie Dog Basket-JMR
Approximate Box size: H 2.50” X W 3” X D 2.50”
Approximate Design size: H 5.50” X W 4.5” including handle

This cute Dog Basket is a perfect gift container for dog lovers or for dog treats. This design is compatible with both 8X12 and 12X12 mats.

You can purchase the Silhouette design file here: https://www.silhouettedesignstore.com/artists/485222

You can purchase the SVG and Cricut compatible file here:https://www.jamieandjenn.com  Coming Soon:)


  1. Cut the design pieces. I used double sided card stock.
  2. Glue the black paw prints to the slightly larger paw prints; centering them. Glue the face piece with eyes and ear cut outs to the larger face piece. Glue the two matching chest/bottom piece so that the straight edge aligns with the score lines in the center square of the basket base; one above and one below the center square.
  3. Flip the basket base as shown. Fold the basket base at the score lines. Glue the light colored paw print pieces with cut outs to the combined paw prints. Using foam adhesive squares; attach the nose to the small muzzle piece and secure the larger muzzle piece to the combined dog face.
  4. Using foam adhesive squares; attach the combined nose/small muzzle to the coordinating shape of the combined dog face.
  5. Apply glue to the top two tabs and secure to the rounded backside piece just above.
  6. Apply glue to the bottom two tabs and secure to the dog silhouette piece just below; creating a box. Glue the combined dog face to the basket base; aligning with the coordinating shapes and at the top. Use foam adhesive squares to attach the two front paws.
  7. Use a foam adhesive square to attach the tail and combined paws to the backside section.
  8. Insert the handle piece into the slots on each side of the combined basket.
  9. I used adhesive enamel dots to accentuate the eyes and finished with a ribbon:)

Monday, April 30, 2018

Schnauzer Dog Basket


Schnauzer Dog Basket-JMR
Approximate Box size: H 2.50” X W 3” X D 2.50”
Approximate Design size: H 5.50” X W 4” including handle

This cute Schnauzer Dog Basket is a perfect gift container for dog lovers or for dog treats. This design is compatible with both 8X12 and 12X12 mats. 

You can purchase the Silhouette design file here: https://www.silhouettedesignstore.com/artists/485222

You can purchase the SVG and Cricut compatible file here:https://www.jamieandjenn.com  Coming Soon:)

  1. Cut the design pieces. I used double sided card stock.
  2. Glue the red collar and yellow circle tag to the coordinating shapes on the black dog silhouette. Glue one of the two light gray fur pieces to the front of the basket base; centering it and aligning at the score line on the full dog silhouette shape. Glue the black paw prints to the slightly larger gray paw prints; centering them. Glue the light gray muzzle piece to the gray dog face silhouette with eye cut outs; aligning the edges.
  3. Flip the basket base as shown. Fold the basket base at the score lines. Glue the combined gray face piece with eye cut outs to the combined black dog silhouette piece; aligning at the top and edges. Glue the white paw print pieces with cut outs to the combined paw prints.
  4. Apply glue to the top two tabs and secure to the rounded backside piece just above.
  5. Apply glue to the bottom two tabs and secure to the dog silhouette piece just below; creating a box. 
  6. Use foam adhesive squares to attach the combined dog face to the coordinating shape on the basket base.
  7. Use foam adhesive squares to attach the small muzzle piece to the combined face. Use foam adhesive squares to attach the front two paws to the front of the basket base.
  8. Use small pieces of foam adhesive squares to attach the eyebrows. Glue the nose into place on the combined face.
  9. Curve the tongue as you like. Apply glue to the top and secure just underneath the small muzzle piece (optional). I used adhesive jewels to accentuate the eyes.
  10. Turn the basket to the back side. Glue the second fur piece to the center of the dog backside; center and align at the bottom.
  11. Attach the tail and combined back paws to the dog backside using foam adhesive squares.
  12. Insert the handle piece into the slots on each side of the combined basket. 
  13. I finished with a ribbon:)