Showing posts with label Party decor. Show all posts

Friday, June 14, 2019

Monarch Lantern


Monarch Lantern (Flameless)-JMRush
Approximate Lantern size: W 3 x D 3 x H 7.75”

This Flameless lantern features a layered transparent frosted effect that is created when vellum paper is used. This design is compatible with both 8X12 and 12X12 mats.

You can purchase the Silhouette design file here: https://www.silhouettedesignstore.com/artists/485222

You can purchase the SVG and Cricut compatible file here: https://www.jamieandjenn.com  Coming Soon:)

To save time, I used the tutorial for the water lily lantern. Same construction process. 

1.Cut design pieces. ( I used double sided card stock and vellum paper)
2.Center and glue the rectangular lily silhouettes (4) to the coordinating rectangle solid lily shapes (4); centering them. Flip the lantern bodies over and glue the solid vellum pieces (4) to the opening in each of the lanterns bodies. Allow to dry.
3. Fold the score lines on the lantern bodies and the square lantern base. Curve the flower petals as you like. 
4. Glue the circular hanger piece to the top of each of the lantern bodies on the peak of the side that has the long side tab.
5. Center the two lantern body pieces. Apply glue to the backside of the right side tab on the left lantern body piece. Attach to the other lantern piece making sure that the bottoms align (joining the two body pieces). Allow to dry.
6. Image of the two lantern bodies glued together.
7. Flip the combined lantern body over ( pretty side up) and glue the combined lily mats to each of the openings on the lantern body; centering them. Allow to dry.
8. Flip the combined lantern body over and apply glue to the last long side tab. Secure the long tab to the other side of the lantern body creating a square box shape.
9. Image of the Lantern body glued together.
10.  Apply glue to one of the top tabs and secure it to the triangular panel to it’s left side.


11. Image of the tab secured to the panel. Repeat for the next tab.
12. Apply glue to the last two tabs and the circular hanger and secure to the inside of the lantern, creating a fully enclosed top. 
(I sometimes use a long object (pencil eraser end) to help secure the tabs on the inside of the lantern top base.)
13. Apply glue to the top two tabs of the Lantern square base and secure to the inside of the sides. Repeat for the bottom two tabs creating a shallow box.
14. Glue the two largest flower petals and two smallest flower petals together; centering them and alternating the petals.
15. Glue the last flower petal to the large petal set;centering and alternating the petals.
16. I used a adhesive jewel for the inside of the flower and attached it to the top of the lantern with a foam adhesive square.
17. Place a flameless candle inside and the lantern top in it’s base. I used a W 2.75” x H 4” color changing pillar flameless candle:).

Wednesday, June 12, 2019

Water Lily Lantern (Flameless)


Water Lily Lantern (Flameless)-JMRush
Approximate Lantern size: W 3 x D 3 x H 7” (H 7.75” with Circular Hanger)

This Flameless lantern features a layered transparent frosted effect that is created when vellum paper is used. This design is compatible with both 8X12 and 12X12 mats. A complete step by step picture tutorial can be found on my blog.

You can purchase the Silhouette design file here: https://www.silhouettedesignstore.com/artists/485222

You can purchase the SVG and Cricut compatible file here: https://www.jamieandjenn.com  Coming Soon:)


1.Cut design pieces. ( I used double sided card stock and vellum paper)
2.Center and glue the rectangular lily silhouettes (4) to the coordinating rectangle solid lily shapes (4); centering them. Flip the lantern bodies over and glue the solid vellum pieces (4) to the opening in each of the lanterns bodies. Allow to dry.
3. Fold the score lines on the lantern bodies and the square lantern base. Curve the flower petals as you like. 
4. Glue the circular hanger piece to the top of each of the lantern bodies on the peak of the side that has the long side tab.
5. Center the two lantern body pieces. Apply glue to the backside of the right side tab on the left lantern body piece. Attach to the other lantern piece making sure that the bottoms align (joining the two body pieces). Allow to dry.
6. Image of the two lantern bodies glued together.
7. Flip the combined lantern body over ( pretty side up) and glue the combined lily mats to each of the openings on the lantern body; centering them. Allow to dry.
8. Flip the combined lantern body over and apply glue to the last long side tab. Secure the long tab to the other side of the lantern body creating a square box shape.
9. Image of the Lantern body glued together.
10.  Apply glue to one of the top tabs and secure it to the triangular panel to it’s left side.

11. Image of the tab secured to the panel. Repeat for the next tab.
12. Apply glue to the last two tabs and the circular hanger and secure to the inside of the lantern, creating a fully enclosed top. 
(I sometimes use a long object (pencil eraser end) to help secure the tabs on the inside of the lantern top base.)
13. Apply glue to the top two tabs of the Lantern square base and secure to the inside of the sides. Repeat for the bottom two tabs creating a shallow box.
14. Glue the two largest flower petals and two smallest flower petals together; centering them and alternating the petals.
15. Glue the last flower petal to the large petal set;centering and alternating the petals.
16. I used a adhesive jewel for the inside of the flower and attached it to the top of the lantern with a foam adhesive square.
17. Place a flameless candle inside and the lantern top in it’s base. I used a W 2.75” x H 4” color changing pillar flameless candle:).


Monday, November 26, 2018

Christmas Tree Hanging Tea Light Lantern

Christmas Tree Hanging Tea Light Lantern (Flameless)-JMRush
Lantern size: W 2.5 x D 2.5 x H 5”


This Flameless Hanging Tea Light Lantern features cut outs and when vellum paper is used, a layered transparent frosted glass effect is created. This lantern has a secure bottom that allows it to be hung and still allows access to the tea light on/off switch. This design is compatible with both 8X12 and 12X12 mats. A complete step by step picture tutorial can be found on my blog:https://jmrushdesigns.blogspot.com/2017/11/hanging-tea-light-lantern.html


You can purchase the Silhouette design file here: https://www.silhouettedesignstore.com/artists/485222

You can purchase the SVG and Cricut compatible file here:https://www.jamieandjenn.com  Coming Soon:)

Wednesday, March 21, 2018

Stitched Bird Hanging Decoration

Stitched Bird Hanging Decoration-JMRush
Approximate size: H4.50” X W6.75”

This cute hanging decoration is an easy to assemble project and coordinates with the love bird nest collection. This file is compatible with both 8X12 and 12X12 mats.

You can purchase the Silhouette design file here: https://www.silhouettedesignstore.com/artists/485222


You can purchase the SVG and Cricut friendly file here:https://www.jamieandjenn.com Coming Soon:)


  1. Cut the design pieces.
  2. Use fishing line, twine, or ribbon to loop through the top holes of the bird shape with two holes in it. Tie the string at the top.
  3. Apply glue to the backside of string bird piece (Both birds should be facing the same direction). Attach the coordinating shape aligning at the edges until secure.
  4. Image of the backside.
  5. I used an adhesive enamel dot to accentuate the eye.
  6. Finish with ribbon if you like:)

Monday, February 5, 2018

Love Hanging Tea Light Lantern


 Love Hanging Tea Light Lantern-JMR
Lantern size: W 2.5 x D 2.5 x H 5”

This Flameless Hanging Tea Light Lantern features cut outs and when vellum paper is used, a layered transparent frosted glass effect is created. This lantern has a secure bottom that allows it to be hung and still allows access to the tea light on/off switch. This design is compatible with both 8X12 and 12X12 mats. 

You can purchase the Silhouette design file here: https://www.silhouettedesignstore.com/artists/485222

You can purchase the SVG and Cricut friendly file here:https://www.jamieandjenn.com Coming Soon:)

1.Cut design pieces. ( I used double sided card stock and vellum paper)
2. Flip the two love lantern window pieces over. Glue the vellum paper to the window panels; centering around each of the cut out sections.
3. Fold all score lines.
4. Line up the two lantern window pieces. Apply glue to the long side tab of the lantern and secure to the other lantern window base piece.
5. Apply glue to the other long side tab of the lantern window base and secure to the inside of the other lantern window base piece; creating a box.
6. This is what it should look like:)
7. Apply glue to one top tab and secure the top tab to the inside of the next angled triangle.
8. Repeat for the rest of the top tabs until fully enclosed.
9.You can use a long utensil to help secure the tabs from the inside of the lantern.
10. Apply glue to the inside of one of the circular hanger pieces. Align with the other circular hanger piece and secure.
11. Apply glue to the bottom two tabs of the Lantern square base and secure to the inside of the sides. 
12. Repeat for the two top tabs creating a shallow box.
13. Apply a dab of glue to the inside of the lantern tea light base just under the slot. (This will help to secure the tab when it passes through.)
14.  Tuck the end tab into the slot creating a circular tube shape. Secure until dry.
15. Place the narrow circular ring piece and square piece over the tube shape you just created.

16. Apply glue to the outside of the tabs on the round side and secure downward to the round piece.


17. Apply glue to the top.
18. Secure the large ring to the top;centering it.
19. Insert flameless votive candle from the bottom.Flip this piece over so the Square side is up. Apply glue to the outside of the tabs on the square side and secure downward to the square piece.
20. Apply glue to the bottom and insert into the shallow square lantern base.
22. Place a flameless tea light candle inside the lantern square base; centering it. Apply glue to the bottom of the square side of the combined 
lantern tea light base. Place inside the lantern square base and secure.
23. Bottom view.
24. Apply glue to the inside edges of this piece and place the lantern window piece inside the box. Secure until dry. 
25. I finished this lantern with a ribbon:)

Monday, June 26, 2017

Bronotosaurus Dino Box


Bronotosaurus Dino Box - JMRush 
Approximate Box size: H 2.50” X W 3” X D 2.50”
Approximate Design size: H 6.75” X W 6.50”

You can purchase this Silhouette design file here: https://www.silhouettedesignstore.com/artists/485222 

1. Cut design pieces. ( I used double sided card stock)
2. Fold the box base at the score lines. Glue the white dino face to the large solid dino body.
3. Apply glue to the top two tabs on the box base and secure to the square shape above.
4. Apply glue to the bottom two tabs on the box base and secure to the irregular shape below forming a complete box.
5. Glue the large dino body shape with cut outs to the combined dino.
6. Using pieces of foam adhesive squares, attach the last dino body shape to the combined dino body.
7. Glue the combined dino to the box base matching up the contour of the box and the dinosaur’s back. Make sure to only apply glue where the dinosaur touches the box.
8. Insert the handle into the side slots on the box.
9. Repeat for the other side.

10. Finish with an enamel jewel to accentuate the eye and a ribbon for a bow tie:)

Wednesday, April 5, 2017

Tulip Tea Light (Flameless)


Tulip Tea Light (Flameless)-JMRush
Approximate Dimensions: W 3.5” x D 3.5” X H 2.75”

This design is compatible with both 8X12 and 12X12 mats and when vellum paper is used, an opaque lantern effect is created. 


You can purchase the Silhouette design file here: https://www.silhouettedesignstore.com/artists/485222


  1. Cut design pieces. (I used double sided card stock and vellum paper)
  2. Match up the petal outline shapes with the coordinating vellum shape. Glue the coordinating vellum piece to the backside of the outline flower. ( You can also cut out another outline flower piece if you would like each side of the vellum flower to have the outline detail (not shown:)
  3. Fold the tabs of the tea light base ( long narrow strip with tabs). Tuck the end tab into the slot creating a circular tube shape. Apply a small dab of glue on the tab to hold in place.
  4. Apply a small dab of glue on the tab to hold in place.    
  5. Place the two narrow circular ring pieces over the tube shape you just created. One toward the top and one toward the bottom.
  6. Apply glue to the outside of one of the rows of tabs and secure to the narrow ring. Repeat for the other set of tabs and circular ring.
  7. Apply glue to the tops of the ring and tabs. Secure the thicker circular ring to the top.
  8. Image of this step completed.
  9. Flip the combined tube over. Place a flameless votive candle inside the tube. Apply glue to the tops of the ring and tabs. Secure the thicker circular ring to the top.
  10. Curve the combined flower and leaves as you like. I used a think marker to curve the flower petals inward. I curved the tops of the petals outward with a thin wood dowel ( shown in final product image).
  11. Apply glue to the backside of the leaves at the points where they make contact with the tea light base and attach to the tea light base.
  12. Apply glue to the bottom of the flower and secure to the tea light base:)

Monday, February 13, 2017

Unicorn Centerpiece Card Keeper


Unicorn Centerpiece Card Keeper- JMRush 
Approximate Box Size: W 2.25” X D 5.75” X H 5.5” 
Height including Unicorn Figure: W 5.5” X D 7.5” X H 10”

The Unicorn Centerpiece has an open box area that can be used to hold classroom Valentine’s or Birthday cards as it doubles as a centerpiece:) This file could also be used as a small gift bag and is compatible with both 8X12 and 12X12 mats. 

You can purchase the Silhouette design file here: https://www.silhouettedesignstore.com/artists/485222


1. Cut the design pieces. ( I used double sided card stock) ( I added to this file during the shooting of this tutorial. You will have two additional rectangles (see image 2), the box base pieces are larger, and there will be two large hair pieces:) I have also grouped the cut file in color sections. You can ungroup as you like:)
2. Two additional rectangles.
3. Glue the Unicorn head with ear, eye, and nose cut outs to it’s coordinating solid base. Glue the unicorn horn with cut outs to it’s coordinating solid base. Glue the thin hooves to the coordinating larger hoove pieces; aligning at the bottom. Glue the eyes with eyelashes to the circles with small circle cut outs; aligning at the small circle and curling as you like. Fold the two tail pieces at the score lines.
4. Glue the combined eyes to the coordinating shapes on the combined unicorn head. Glue the hair to the combined unicorn head; centering it. Glue the combined hooves to the front of the full unicorn silhouette and unicorn backside at the coordinating shapes. Apply glue to one side of the scored tail section and secure the other scored tail section aligning the edges.
5. Use foam adhesive squares to attach the oval muzzle piece with nose holes to the coordinating shape on the combined unicorn; aligning the nose holes. Use foam adhesive squares to attach the combined unicorn horn to the combined unicorn head; aligning at the top of the horn.
6. Use foam adhesive squares down the seam line of the combined scored tail section and attach to the coordinating solid tail base.
7. Use Foam adhesive squares to attach the combined unicorn head to one of the large hair pieces; aligning at the bottom center. Flip the full unicorn silhouette and backside over and glue the remaining combined hooves to the coordinating shapes; aligning at the bottom and edges. Flip both silhouettes back over.
8. Use foam adhesive squares to attach the combined head to the full unicorn silhouette; aligning at the unicorn horn and centering. Glue the second large hair piece to the backside of this combined piece to the coordinating shape. Use foam adhesive squares to attach the combined tail to the backside silhouette section; centering horizontal and vertically. Apply glue to the very right edge of the largest box base piece. ( Your box base will be larger than what is shown:) Align the center tab of the smaller box base piece and place it on top of the glue area; aligning at the score line. Allow to dry.
9. Like this:)
10. Fold the tabs at the score lines of the combined box base.


11. Apply glue to backsides of the top and bottom vertical tabs. Secure to the rectangular shape in the middle of the combined box base.
12. Apply glue to the backsides of the top and bottom horizontal tabs and secure to the inside of the box.
13. It should look like this:)
14. Two gray rectangles. Apply glue to the backside of each and secure to the narrow sides of the box base; aligning at the bottom (open are of the box is up)
15. Repeating for the other narrow side.
16. Apply glue to the entire white section of the narrow section of the box base and along the very edges of the gray rectangle.  Attach the combined backside/tail unicorn silhouette; centering it and aligning the hooves with the bottom edge of the box base. Allow to dry.
17. Repeat for the other narrow side of the box base. 
18. Attach the combined full unicorn silhouette; centering it and aligning the hooves with the bottom edge of the box base. Allow to dry.

19. I finished with ribbons and an enamel jewel in the center:)

Sunday, August 7, 2016

Ice Cream Truck Treat Box

Ice Cream Truck Treat Box-JMRush

Approximate size: W 6.25” X  H 3.5” X D 2”

The Ice Cream Truck Treat Box has an attached lid and is great for party favors or to use as a centerpiece for your summer parties. This design is compatible with 8x12 or 12X12 mats.

You can purchase the Silhouette design file here: https://www.silhouettedesignstore.com/artists/485222


Color guide for design pieces.

1.Cut design pieces. ( I used double sided card stock)
2. Glue the largest circles to the matching shapes on the solid truck shapes.
3. Glue the truck shapes with cut outs to the coordinating solid truck shape. Glue the second largest circles to the largest circles that you just attached to the solid truck shape; centering it within the circles.
4. Glue the smaller door frames to the larger ones (2). Glue the third largest circles to the combined circles on the combined truck shape; centering them. Glue the scalloped curtain shape to the inside top of the large window on the combined truck shape.
5. Glue the front grill shape with cut outs to it’s solid base. Glue the ice cream sign to it’s solid base. Glue the rectangular window shapes to the coordinating shapes ( The windshield wiper design is different then the arrow shaped one shown in this tutorial) 
6. Glue the ice cream sandwich cut out piece to the coordinating solid piece ( the background piece is shown as grey in this tutorial- I switched it to black in the final image) Glue the orange popsicle to it’s base. Glue the largest rocket pop shape to it’s base. Glue the second largest rocket piece to the combined rocket piece. Glue the smallest white circles to the combined grill shape in the coordinating shapes.
7.Glue the smallest rocket pop ( red ) shape to the combined rocket pop. Flip the box bases over ( pretty side down) as shown in the photo. Fold the long tab in the center and apply glue to the backside. Line up the two box base pieces and attach.
8. Fold the tabs on the smallest box base piece and align with the the bottom section to the left of the seam. Apply glue to the top tab and secure into place.
9. Fold the tabs on the upper left of the combined box base. Apply glue to the backside of the tab closest to the center. Attach to the center strip to the right of the tab.
10. Apply glue to the backside of the top tab on the bottom box base section. Secure to the left side panel.
11.  Repeat for the next two tabs.
12. Apply glue to the right side tabs of the bottom section and to the backside tab. Secure to the right side panel- creating a box shape.
13. Allow to dry. This is what it should look like:) 
14. Close the top box tab by securing the tab in the slot.
15. Glue the combined truck shape to it’s coordinating box base side.

16. Repeat for the other side. (Be careful not to glue the top backside of truck design with a window so as not to glue the box tab closure slot)
17. Glue the long wheel hub to the coordinating side.
18. Fold the tab so that the bumper sticks out. Glue the end section to the other side of the truck ( there is a score line to line up with:)
19. Repeat for the other side.
20. Tuck the end score line underneath the other wheel hub piece.
21. Use pieces of foam adhesive squares to attach the ice cream and sign to the box base side without a window. Glue the combined door to the coordinating shape on the box base.
22. Glue the small wheel hub shape into place.
23. Flip to the other side. Glue the combined door into place.
24. Glue the smaller wheel hub to the coordinating shape.
25. Glue the solid rectangular pieces to their coordinating shapes on the front and top of the truck box base.
26. Glue the combined grill piece with headlights to the front of the truck box base. Glue the solid rectangular shape with rounded corners to the backside of the windshield piece ( with windshield wipers )
27. Apply glue to the backside and attach to the front of the box base.
28. It should look like this:)
29. Glue the combined backside piece to the back of the truck.
30. Glue the rectangular shape with rounded corners to the inside of the window.


31. Glue the small open circles to the solid red circles.
32. Like this.
33. Glue to the backside of the truck.
34. Your box is complete:)


Thursday, July 14, 2016

Straw Sliders

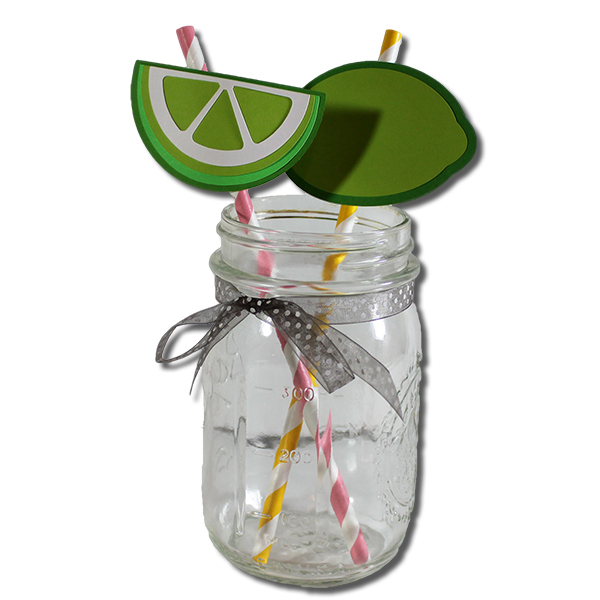
These Straw Sliders are perfect for your Summer parties.  
They are compatible with both the 8x12 and 12x12 mats.

You can find these files in Silhouette format here: https://www.silhouettedesignstore.com/artists/485222 

Lemon Straw Slider


Lime Straw Slider


Watermelon Straw Slider


You can find these files in Silhouette format here:  https://www.silhouettedesignstore.com/artists/485222