Showing posts with label Cat. Show all posts

Friday, October 22, 2021

Black Cat Open Mouth Treat Box

Black Cat Open Mouth Treat Box-JMRush

Approximate Size: W 5” x D 1.25”x H 5.5”

Approximate Box size: W 2.5” x D 1 x H 4” 


This box opens by lifting the character’s head to to expose the opening to the treat box. This simple to construct design would be perfect to hold your goodies for Halloween or birthday parties. This design is compatible with both 8X12 and 12X12 mats.


You can purchase the Silhouette design file here: https://www.silhouettedesignstore.com/artists/485222


1. Cut the design pieces. ( I used double sided card stock)

2. Fold the box and Mouth base at the score lines.

3. Glue the pink mouth piece (with holes) to the coordinating shape on the mouth base;aligning at the inner oval cut out shape.

4. Use pieces of foam adhesive squares to attach the teeth shapes to the coordinating shapes on the combined mouth base.

5.  Glue the two tiny oval white pieces to the coordinating shapes on the eyes. This is what it should look like:)

6. Flip the mouth base top over, like so. Glue the Cat head to the coordinating shape; aligning at the top of the ears.


7. I used an orange marker on the edges of the cat eyes. Glue the cat eyes into place.

8. Place the Cat nose on the cat face to find placement and then remove.

9. Cut thread ( approximately three strands of 4inches).

10. Attach the threads with glue to the area you picked to place the Cat nose. Allow to dry.

11. Using a foam adhesive square, place the Cat nose on top of the threads.

12. I used adhesive jewels to accent the eyes.


13. Apply glue to the small vertical side tab at the left side of the bottom of the box base.

14. Secure the small vertical side tab to the 1 inch (width) rectangles just above. 

15. Apply glue to the very left vertical tab, the horizontal tab, and the side tab on the bottom right and attach the side and bottom of the base…wrapping it crating a box.

16. This is what it should look like:)

17. Tuck the tab into the slot on the top.

18. Flip the box base over and apply glue to the area just outside the oval cut out.


 19. Attach the combined Cat head; centering it around the cut out oval shape and allow to dry.

20. I finished by adding a ribbon and filling with fun sized candies.

Wednesday, October 9, 2019

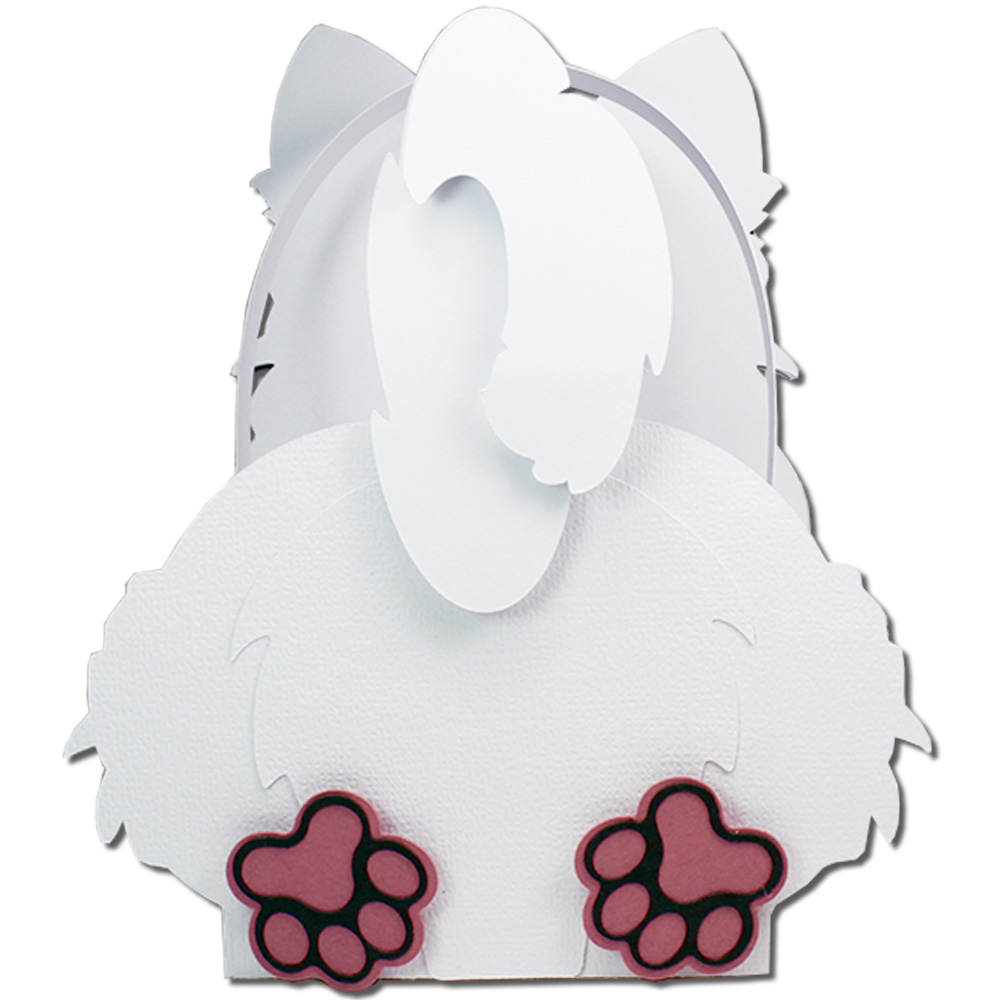
White Long Hair Cat Handle Basket


White Long Hair Cat Handle Basket- JMRush 
Approximate Box size: H 2.25” X W 3” X D 2.25”
Approximate Design size: W 4.5” X H 5.5” including handle

This cute basket design is a perfect container for treats for your favorite feline, a small gift for your veterinarian, or a party favor. This design is compatible with both 8X12 and 12X12 mats.


You can purchase the Silhouette design file here: https://www.silhouettedesignstore.com/artists/485222

You can purchase the SVG and Cricut compatible file here: https://www.jamieandjenn.com  

  1. Cut design pieces. ( I used double sided card stock and glitter card stock of the eyes) (There are two pink noses in this file that is not shown in the tutorial and I adjusted the tail to be larger)
  2. Glue the face piece with openings and a chin to the coordinating black solid cat face. I used a marker to color the outside edges of both large blue eyes. Glue them to the openings in the combined cat face. Glue the smaller solid paws and feet to the larger solid feet and paws.
  3. Glue the fury bottom piece to the coordinating shape on the lower section of the basket base. Glue the other fury chest/head piece to the coordinating shape on the upper section of the basket base.
  4. Glue the combined cat face to the cat face/chest piece. Glue the inner ears to the coordinating shape on the combined cat face. Using foam adhesive squares, attach the smaller tail to the coordinating shape on the larger tail. Glue the small oval white pieces to the cording shapes on the cat’s eyes.
  5. Attach the smallest cat head (with cut outs) to the combined cat face using foam adhesive squares. Glue the nose into place.
  6. Glue the combined cat to the coordinating shape on the basket. Use foam adhesive squares to attach the front paws to the top section of the basket and the back feet and tail to the bottom section.
  7. I used enamel dots to accentuate the eyes.
  8. Flip the combined basket over. Fold the basket base at the score lines.
  9. Apply glue to the top two tabs on the basket base and secure to the Cat shape above.
  10. Apply glue to the bottom two tabs on the basket base and secure to the rounded shape above creating a box.
  11. Image of box completed.
  12. Insert the handle on either side of the basket.
  13. I added a ribbon.
  14. Use three small lengths of thread and apply hot glue to one of the groups of ends. Attach the nose. Repeat for the other side:)
  15. Image of the whiskers glued.
  16. Hot glue the second pink nose on top of the whiskers:)


Wednesday, October 2, 2019

Black Cat Handle Basket


Black Cat Handle Basket- JMRush 
Approximate Box size: H 2.50” X W 3” X D 2.50”
Approximate Design size: W 4.5” X H 5.5” including handle

This cute basket design is a perfect container for treats for your favorite feline, a small gift for your veterinarian, or a Halloween party favor. This design is compatible with both 8X12 and 12X12 mats. 


You can purchase the Silhouette design file here: https://www.silhouettedesignstore.com/artists/485222

You can purchase the SVG and Cricut compatible file here: https://www.jamieandjenn.com  


  1. Cut design pieces. ( I used double sided card stock and glitter card stock of the eyes) 
  2. Glue the fury bottom piece to the coordinating shape on the lower section of the basket base. Glue the other fury chest/head piece to the coordinating shape on the upper section of the basket base. I used a marker to color the outside edges of both large yellow eyes.
  3. Glue the yellow eyes to the coordinating shape on the combined basket. Glue the smaller solid paws and feet to the larger solid feet and paws.
  4. Attach the cat head ( black with cut outs) to the combined basket using foam adhesive squares.
  5. Use a small piece of foam adhesive square to attach the nose. ( Hint- I use a black sharpie to color the edges of the white foam adhesive square so it’s not so noticeable:) Use foam adhesive squares to attach the front paws to the top section of the basket and the back feet and tail to the bottom section.
  6. Flip the combined basket over. Fold the basket base at the score lines.
  7. Apply glue to the top two tabs on the basket base and secure to the rounded shape above.
  8. Apply glue to the bottom two tabs on the basket base and secure to the head shape above creating a box.
  9. Insert the handle on either side of the basket.
  10. Use three small lengths of thread and apply hot glue to one of the groups of ends. Attach underneath the nose. Repeat for the other side:)
  11. I used enamel dots to accentuate the eyes and added a ribbon:)

Tuesday, October 1, 2019

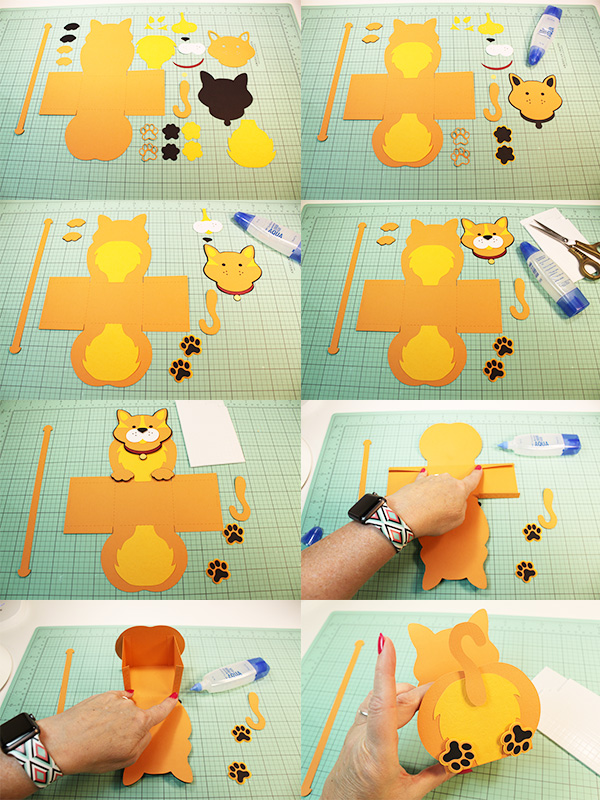
Yellow Cat Handle Basket


Yellow Cat Handle Basket- JMRush 
Approximate Box size: H 2.50” X W 3” X D 2.50”
Approximate Design size: W 3.75” X H 5.5” including handle

This cute basket design is a perfect container for treats for your favorite feline or a small gift for your veterinarian. This design is compatible with both 8X12 and 12X12 mats.


You can purchase the Silhouette design file here: https://www.silhouettedesignstore.com/artists/485222


You can purchase the SVG and Cricut compatible file here: https://www.jamieandjenn.com 

  1. Cut design pieces. ( I used double sided card stock) 
  2. Glue the fury bottom piece to the coordinating shape on the lower section of the basket base. Glue the other fury chest piece to the coordinating shape on the upper section of the basket base. Glue the cat head shape with cut outs to the solid black cat head shape. Glue the smaller solid paws and feet to the larger solid feet and paws.
  3. Glue the small rounded muzzle pieces to the muzzle base ( that has a coordinating shape plus a long vertical line). Glue the small triangular face markings to either side of the combined cat head. Glue the inner ear pieces to the combined cat head. Glue the collar and collar tag to the combined cat head. Glue the feet pieces that  have cutouts to the combined feet.
  4. Glue the combined muzzle piece to the combined cat head. Use a small piece of foam adhesive square to attach the nose.
  5. Use foam adhesive squares to attach the combined head to the coordinating shape on the basket base. use foam adhesive squares to attach the front paws to the basket.
  6. Flip the combined basket over. Fold the basket base at the score lines. Apply glue to the top two tabs on the basket base and secure to the rounded shape above.
  7. Apply glue to the bottom two tabs on the basket base and secure to the head shape above creating a box.
  8. Use foam adhesive squares to attach the feet and the tail to the back of the basket.
  9. Insert the handle on either side of the basket.
  10. I used enamel dots to accentuate the eyes and added a ribbon.
  11. Use three small lengths of thread and apply hot glue to one of the groups of ends. Attach underneath the nose. Repeat for the other side:)


Wednesday, January 18, 2017

Cat Hug Treat Box

Cat Hug Treat Box-JMRush
Approximate box size: W 3.25” x D 2.25 x H .75”
(W 4.75 X H 3.5” including character)

This treat box features character arms that open to a small treat box. This design is perfect for Valentine’s or Birthday parties. This design is compatible with both 8X12 and 12X12 mats.

You can purchase the Silhouette design file here: https://www.silhouettedesignstore.com/artists/485222


1.Cut design pieces. (I used double sided card stock for the box base).
2. Glue the cat head with cut outs to the solid cat head base. Fold the score lines in the box base.
3.  Apply glue to the two top tabs of the box base and secure them to the top (head) panel.
4. Apply glue to the bottom two tabs and secure them to the bottom panel creating a box.
5. Apply glue to the bottom tab of the center narrow strip section. Secure the center narrow strip tab to the backside of the inside of the box.
6. Glue the inner ear shapes to the coordinating shapes on the combined cat head. Cut three sections of thread.
7. Glue the centers of the three pieces of thread to the top center of the muzzle piece.
8. Attach the nose over the piece of thread.
9. Use a foam adhesive square to attach the combined muzzle to the combined cat head. I used enamel dots to accentuate the eyes and a ribbon. 
10. Use foam adhesive squares to attach the combined head to the coordinating shape on the box base. The paws tuck into the slots of the center strip:) Use a foam adhesive square to attach the heart shape in the center of the paws.
11.-12. Use a foam adhesive square to attach the tail on the backside. Fill with candy or small treats:)

Wednesday, January 11, 2017

Cat Candy Pocket


Cat Candy Pocket- JMRush 
Approximate size: W 4.5” X H 8”
Approximate Pocket size: W 3” X H 4”


The Cat Candy Pocket has a open center section that is perfect for holding snack sized candies for classroom parties, birthday party treats, or for Valentine’s Day. This file is compatible with both 8X12 and 12X12 mats.

You can purchase the Silhouette design file here: https://www.silhouettedesignstore.com/artists/485222


1.Cut design pieces. ( There is no heart design in this file but is shown in images...oops)
2. Fold the tabs on the cat pocket piece. Apply glue to the tabs. Fold forward and secure to the upper shape of the pocket. Glue the cat head with cut outs to it’s matching solid base.
3. Glue the inner ear (two small triangular shaped) pieces to the coordinating shape on the combined cat head.
4. Attach the pocket to the cat shape with a tail using foam adhesive squares. Aligning at the base of the cat tail.
5. Cut three sections of thread and glue their centers to the top center of the front side of the muzzle piece.
6. Glue the nose on top of the center glue/thread on the muzzle piece.
7. Attach the combined muzzle to the combined cat using foam adhesive squares. Attach the combined head to the combined cat base using foam adhesive squares and aligning the edges on each side.
8. I finished with enamel dots to accentuate the eyes, a ribbon, and inserted snack sized Reese’s pieces in the pocket:)

Tuesday, December 13, 2016

Stacked Christmas Cat Card


Stacked Christmas Cat Card- JMRush 
Approximate Card size: H 5.50” X W 4.25”

This design is compatible with both 8X12 and 12X12 mats. 

You can purchase the Silhouette design file here: https://www.silhouettedesignstore.com/artists/485222


1. Cut design pieces.
2. Fold the card base. Glue the largest cat silhouette (with tail) to the cat silhouette (solid with hat and scarf). Glue the oval head shape without ears to the solid cat head without a pom pom. Glue the center white chest section to the front two leg section; aligning the coordinating shapes at the top right. Glue the small rounded muzzle pieces to the muzzle base ( that has a coordinating shape plus a long vertical line). Glue the small triangular face markings to either side of the cat head with ear and eye cut outs.
3. Glue the Nose to the combined muzzle piece. Glue the solid head with a pom pom on the right side to the solid cat head piece with a hat and scarf. Glue the combined cat head with ear/eye openings to the combined solid cat head piece.
4. Glue the combined cat head to the combined cat head hat /scarf piece. Use pieces of foam adhesive squares to attach the cat silhouette without a tail to the combined cat silhouette base.
5. Glue the last two triangular markings to the combined cat silhouette. One on the first layer and one on the second layer; matching the coordinating contours. Attach the combined muzzle/nose piece to the combined cat head with a foam adhesive square in the lower center and glue on the narrow top strip (backside).
6. Image of the muzzle/nose piece being secured to the combined cat head.
7. Use foam adhesive squares to attach the combined front legs to the combined cat silhouette. Use foam adhesive squares to attach the combined head to the combined cat silhouette.
8. Glue the combined cat silhouette to the front of the card. I used adhesive enamel dots to accentuate the eyes:)


Monday, October 24, 2016

Spooky Scene Triptych Card


Spooky Scene Triptych Card-JMRush
Approximate size: W 5.25 x H 4.25”

The Nativity Triptych Card features a front cover that depicts a haunted house and is bordered by

side panels that depict a grave yard scene with a raven on one side and a grave yard scene with an owl on the other. The card opens to a blank back page ( like a regular card ) and fits in a regular envelope. This design is compatible with both 8X12 and 12X12 mats. 


You can purchase the Silhouette design file here: https://www.silhouettedesignstore.com/artists/485222


1.Cut design pieces. (I used double sided card stock)
2. Fold the card base along the score lines. Glue the haunted house panel to the slightly larger haunted house panel. Glue the larger solid rectangle piece to the inside center of the card base.
3. Center and glue the owl panel to the front of it’s coordinating panel on the card base. Repeat for the raven silhouette panel. 
4. Fold the top flap on the cad base down and glue the combined haunted house panel to the front of this flap; centering it.


Spooky Lantern (Flameless)


Spooky Lantern (Flameless)-JMRush
Approximate Lantern size: W 3 x D 3 x H 7” (H 8” with Star Topper)


This Flameless lantern features a Spooky Haunted House design which is wrapped around each of the four sides. A layered transparent frosted effect is created when vellum paper is used. This design is compatible with both 8X12 and 12X12 mats. 

You can purchase the Silhouette design file here: https://www.silhouettedesignstore.com/artists/485222


1.Cut design pieces. ( I used double sided card stock and vellum paper)
2. Flip the two lantern pieces over ( pretty side down) 
3. Glue the rectangular vellum pieces to the open areas of the lantern body- centering each rectangle with the open window area of the lantern body. 
4. Glue the triangular vellum pieces to the top triangular open areas of the lantern body- centering each triangle with the open window area of the lantern body.
5. Glue the Star shaped hangers together. ( Make sure the stems of these piece remain separate)
6. Glue one of the stems of the star hanger combined piece to the inside of the top of the third from the left window panel. (The other stem will be glued inside the lantern later)
7. Fold the score lines of the lantern body. 
8. Center the two lantern body pieces. Apply glue to the backside of the right side tab on the left lantern body piece. Attach to the other lantern piece making sure that the bottoms align (joining the two body pieces).
9. Apply glue to the side long tab on the very right side. Secure the long side tab to the other side creating a box.
10. Apply glue to the top tab with the star hanger and secure it to the triangular panel to it’s left side.
11. Repeat for the next tab. Continue applying glue to the top tabs until the top is complete.
12. Apply glue to the other side of the star hanger piece and secure to the opposite side inside the lantern. Hard to see pic of the inside…sorry.
13. Fold the score lines on the lantern square base.
14. Apply glue to the top two tabs of the Lantern square base and secure to the inside of the sides.
15. Repeat for the bottom two tabs creating a shallow box.
16. Place a flameless candle inside and the lantern top in it’s base.( I used a W 2.75” x H 4” pillar color changing flameless candle). I finished with a ribbon on top:)


Tuesday, October 18, 2016

Black Cat Hug Treat Box


Black Cat Hug Treat Box-JMRush
Approximate box size: W 3.25” x D 2.25 x H .75” 
(W 3.5 X H 5.25” including character)

This treat box features character arms that open to a small treat box. This design is perfect for Halloween parties or for your special trick or treaters. This design is compatible with both 8X12 and 12X12 mats.


You can purchase the Silhouette design file here: https://www.silhouettedesignstore.com/artists/485222


1.Cut design pieces. (I used double sided card stock for the box base).
2. Use foam adhesive squares to attach the cat nose to the cat nose/whisker base and again to attach the combined nose/whisker piece to the cat head.
3. Use foam adhesive squares to attach the combined cat head to the box base; centering and aligning with the coordinating shape. I used enamel dots to accentuate the eyes.
4. Fold the box base along score lines.
5. Apply glue to the two top tabs and secure them to the top (head) panel.
6. Apply glue to the bottom two tabs and secure them to the bottom panel creating a box.
7. Apply glue to the bottom tab of the center narrow strip section. Secure the center narrow strip tab to the backside of the inside of the box.
8. Glue the hands to the coordinating shapes on the box base hands. The hands tuck into the slots of the center strip:)
9. Use foam adhesive squares to attach the tail to the backside of the box; aligning with the bottom of the box base. Finish with a ribbon:)


Tuesday, February 2, 2016

Cat Hug Gift Card Holder


Cat Hug Gift Card Holder-JMRush
Approximate Card size: 4” x 5.75” 


This card features character arms that open to release a hidden gift card section. This design is compatible with both 8X12 and 12X12 mats and can be cut on different colored cardstock to create any color of Cat.


1.Cut design pieces. (I used double sided cardstock for the card base)
2. Fold the card along score lines.
3. Apply glue the bottom of the side tabs on the card base. Secure by folding upward toward the card base.
4.Glue the head shape with eye cut outs on the solid head base. Glue the small muzzle piece to the larger one and glue the nose on the small muzzle piece.
5. Glue the circular medallion piece to the combined head piece centering it in the my circular shape at the bottom. Glue the collar strip to the combined head piece.
6. -7. Apply a small dab of glue to the narrow strip of the backside of the combined muzzle piece and use foam adhesive squares on the bottom backside of this piece to attach to the combined head piece. The narrow strip will be glued flat to the surface of the combined head piece and the lower part of the muzzle will have more dimension. Insert the inner ear shape pieces to the corresponding shapes on the combined head piece (optional- I did not use them on the image above). 
8. Using foam adhesive squares, attach the head to the card base.
The gift card can be inserted into the pocket of the card base and the hands tuck into the slots on the front. Attach the Heart to the front of the card base in-between the Cat’s paws. I used a ribbon to decorate the heart and enamel dots to enhance the eyes.
9. -12. Cut 6 small strips of black sewing thread. Using a toothpick or other small pointed instrument, apply a dab of glue into each of the whisker holes on the combined muzzle piece. Insert the small sections of black sewing thread into each of the holes tucking them underneath the muzzle shape. Allow to dry completely. :)